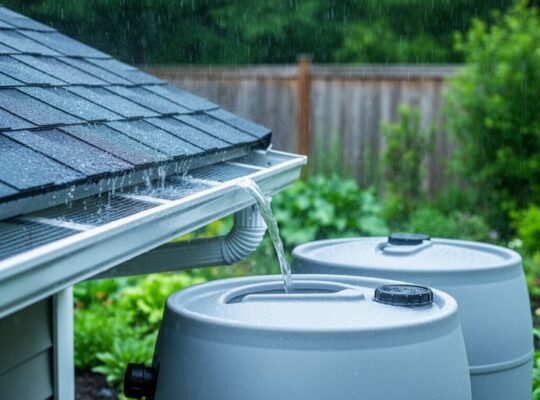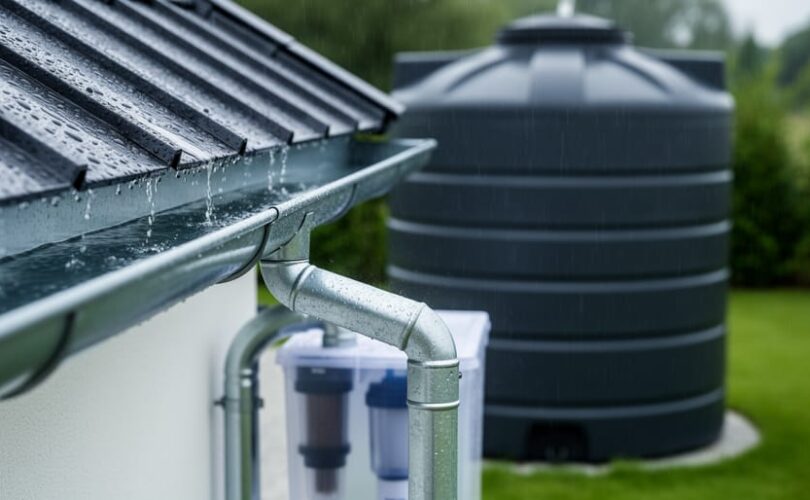
A rainwater harvesting system transforms roof runoff into a reliable water source through six core components: the catchment surface, conveyance system, filtration units, storage tank, distribution network, and overflow mechanism. Together, these elements capture, clean, store, and deliver water for landscape irrigation, toilet flushing, laundry, and with proper treatment, even potable use. Understanding how each component functions and fits into the larger system empowers you to design an efficient setup that meets your specific needs while reducing municipal water dependency by 30 to 50 percent in most residential applications.
The beauty of rainwater harvesting lies in its adaptability. A basic system collecting water for garden irrigation requires minimal filtration and a simple storage solution, while applications demanding higher water quality need multi-stage filtration and UV treatment. Every component serves a distinct purpose in maintaining water quality and system efficiency. The catchment area, typically your existing roof, determines collection capacity. Gutters and downspouts form the conveyance network that channels water to filtration stages, where debris and contaminants are removed before storage. Your tank holds the harvested water until distribution, while overflow protection prevents flooding during heavy rainfall.
This practical guide walks you through each component with selection criteria, installation considerations, and maintenance requirements. Whether you’re planning a DIY installation or coordinating with professionals, you’ll gain the knowledge to build a system that turns rainfall into a sustainable water resource for your home or business.
What You’ll Need: Components and Materials for Your Rainwater Harvesting System
Choosing the Right Storage Tank
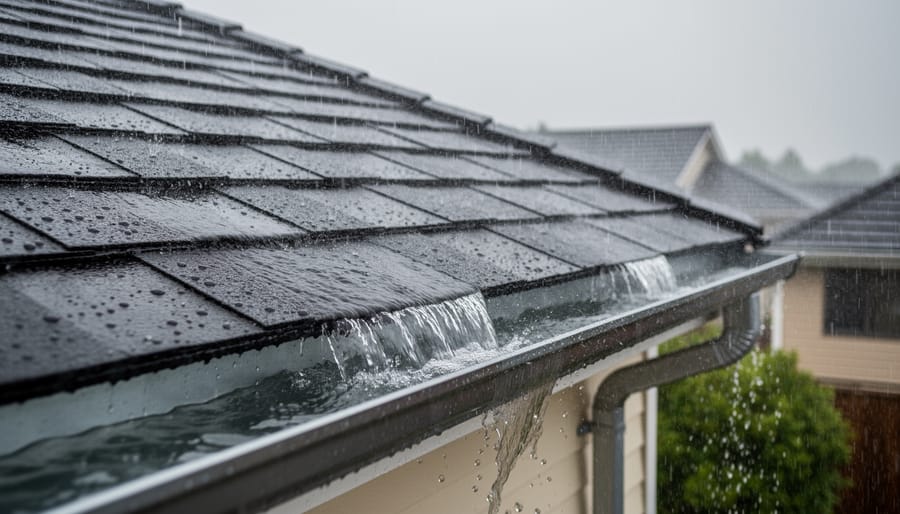
The storage tank is the heart of your rainwater harvesting system, and choosing wisely now prevents costly upgrades later. Your decision hinges on three factors: material durability, capacity needs, and where you place the tank.
Common tank materials each bring trade-offs. Polyethylene tanks are lightweight, affordable, and resist corrosion, making them popular for residential systems. They’re available in sizes from 50 to 10,000 gallons but can degrade under prolonged UV exposure unless treated. Fiberglass tanks offer excellent UV resistance and longevity, handling large capacities with minimal maintenance, though they cost more upfront. Concrete tanks work well for underground installations due to their strength and ability to keep water cool, but they’re heavy, require professional installation, and may leach lime into water initially. Metal tanks, typically stainless steel or galvanized steel, are durable and compact but prone to rust if the coating fails.
To calculate capacity, multiply your roof area in square feet by annual rainfall in inches, then by 0.623 to get gallons. A 1,500-square-foot roof in an area receiving 40 inches annually yields about 37,380 gallons per year. Size your tank to capture at least two weeks of household demand during dry periods.
Above-ground tanks are easier to install and inspect but take up yard space and may freeze in cold climates. Underground tanks stay out of sight and maintain stable temperatures, yet they cost more to install and require excavation permits.
Filtration Components for Clean Water
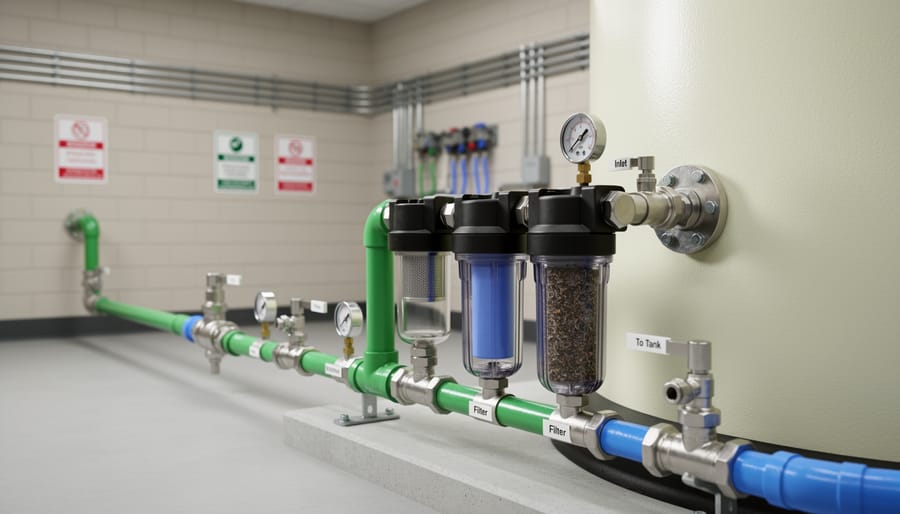
Effective filtration keeps debris, contaminants, and pathogens out of your stored rainwater, extending tank life and protecting water quality. Three components form your defense system: pre-filtration screens, first-flush diverters, and sediment filters.
Pre-filtration screens attach to downspouts or tank inlets, blocking leaves, twigs, and large debris before they enter your system. Choose stainless steel or UV-resistant mesh with 1-2mm openings for optimal particle removal without restricting flow.
First-flush diverters capture and divert the initial 10-20 gallons of runoff from each rain event, which carries the highest concentration of roof contaminants like bird droppings, dust, and atmospheric pollutants. This simple device dramatically improves stored water quality by preventing the dirtiest water from reaching your tank.
Sediment filters provide a final barrier, removing fine particles that bypass earlier stages. Install these at the tank inlet or on the distribution line to capture silt and organic matter down to 50 microns.
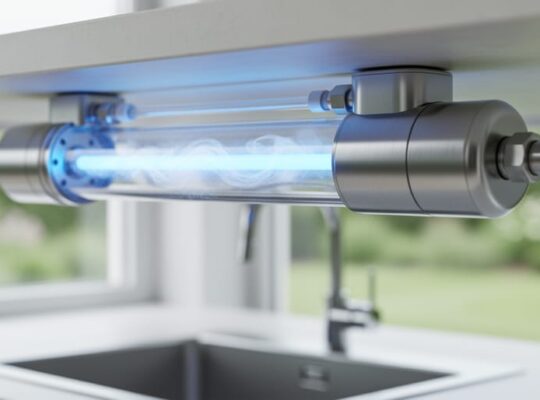
For potable water applications, these filtration components work as the first line of defense, but they cannot remove all microorganisms or dissolved contaminants. Pair your rainwater system with advanced filtration technology like UV sterilization or reverse osmosis to ensure drinking water safety.
Safety Considerations and Important Warnings
Before you begin installation, understand the critical safety requirements that protect both your property and health. Rainwater harvesting systems involve structural loads, electrical components, and stored water that can pose serious risks if not properly addressed.
Structural Load Assessment
Your roof must support the combined weight of full gutters, standing water during heavy rainfall, and any roof-mounted collection equipment. A single cubic meter of water weighs 1,000 kilograms, and saturated debris in gutters adds additional load. Consult a structural engineer if you plan to install large collection surfaces or roof-mounted pre-filters on older buildings. Verify that your roof structure can handle the dynamic loads during storms, not just static weight.
Electrical Safety for Pumps
Any pump installation requires proper electrical grounding and GFCI (Ground Fault Circuit Interrupter) protection to prevent electrocution. Never run extension cords to pumps as permanent solutions. Hire a licensed electrician for all wiring connections, especially for submersible pumps inside tanks where water contact creates severe shock hazards. Keep electrical components away from areas prone to flooding or direct water exposure.
Water Quality and Health Protection
Test your stored water regularly for bacterial contamination, pH levels, and sediment. Mosquitoes breed in standing water within 7 days, so install fine mesh screens (1mm or smaller) on all tank openings, vents, and overflow pipes. Never assume collected rainwater is safe for drinking without proper treatment, roof runoff contains bird droppings, dust, chemicals, and airborne pollutants that require filtration and purification.
Overflow and Foundation Protection
Position overflow pipes to discharge at least 3 meters from your foundation to prevent water damage, soil erosion, and basement flooding. Ensure overflow outlets are larger than inlet pipes to handle sudden heavy rainfall without tank rupture. Direct overflow toward drainage areas or rain gardens, never toward neighboring properties or sidewalks where it creates liability.
Check your local regulations, many jurisdictions require permits, setback distances from property lines, and specific backflow prevention devices when connecting to household plumbing.
Step-by-Step Installation Process
Step 1: Assess and Prepare Your Catchment Surface
Start by inspecting your roof or designated catchment area for structural integrity and cleanliness. Calculate the surface area in square feet, multiply length by width for rectangular roofs, accounting for pitch if necessary. This measurement helps you accurately size your system based on your local rainfall patterns and water needs.
Check that your roof material is suitable for water collection. Metal, tile, and composite shingles work well, while asphalt shingles may require additional filtration due to petroleum compounds. Avoid collecting from roofs treated with biocides or wood preservatives if you plan potable use even with purification.
Clean the entire catchment surface thoroughly, removing leaves, dirt, bird droppings, and debris that would contaminate your first harvest. Verify that the roof slopes at least 1/4 inch per foot toward gutters to prevent water pooling and stagnation. Repair any damaged sections, seal cracks, and trim overhanging branches that drop debris onto the collection area.
Step 2: Install Gutters and Downspouts
Start by determining gutter size based on your roof’s square footage and local rainfall intensity. For most residential applications, 5-inch K-style gutters handle up to 5,600 square feet of roof area, while 6-inch gutters accommodate larger surfaces or regions with heavy downpours. Commercial systems typically require 6-inch or custom industrial gutters.
Mount gutter hangers every 24 inches along the fascia board, ensuring a consistent slope of 1/16 inch per foot toward downspouts. Use a chalk line and level to mark this gradual decline, it’s barely noticeable to the eye but critical for proper drainage. Too steep creates excessive water velocity that can splash over; too flat allows standing water and debris accumulation.
Secure downspouts at wall contact points with straps every 6 feet. Position them to discharge directly into your first-flush diverter or pre-filter assembly rather than straight into the storage tank. This connection point becomes the gateway for your entire system, so seal all joints with waterproof sealant rated for outdoor use.
Install mesh leaf guards across the gutter opening to block leaves, twigs, and larger debris before they enter your system. Choose guards with openings small enough to catch organic matter but large enough to allow water flow, typically 1/4 inch mesh works well. These guards dramatically reduce maintenance needs and protect downstream filtration components from clogging.
Step 3: Set Up First-Flush Diversion and Pre-Filtration
The first flush of rainwater washes accumulated dirt, bird droppings, pollen, and atmospheric pollutants off your catchment surface. Without diversion, this contaminated water flows directly into your storage tank, compromising water quality and increasing purification demands.
Install the first-flush diverter on your downspout before it reaches the storage tank. Most residential systems need a diverter capacity of 10 gallons per 1,000 square feet of roof area. Position the diverter vertically with the chamber at least 12 inches below the downspout connection. The chamber fills automatically during initial rainfall, and a ball float or standpipe mechanism prevents this dirty water from entering your main collection line. Install a drainage valve at the bottom for manual flushing between rain events.
Before the diverter, attach mesh screens (1-2mm openings) across your downspout to catch leaves and large debris. These screens need cleaning after each significant rainfall. After the diverter, connect an inline sediment filter (5-20 micron rating) to capture finer particles. This three-stage approach protects your stored water and extends the life of downstream purification systems.
Step 4: Position and Connect the Storage Tank
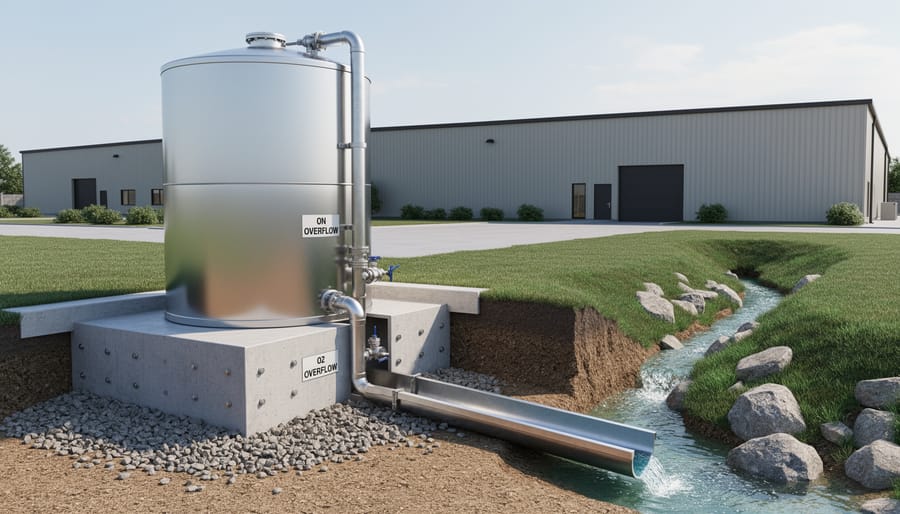
Proper tank positioning requires a level, stable foundation that can support the full weight of water, remember that a 1,000-gallon tank weighs over 8,000 pounds when filled. Pour a concrete pad at least four inches thick, or use compacted gravel with reinforced pavers for smaller tanks. The foundation must extend six inches beyond the tank’s footprint on all sides.
Position the tank within 10 feet of your downspout connection to minimize piping runs, but maintain at least three feet of clearance from your home’s foundation. This spacing allows overflow water to disperse safely without compromising structural integrity. Ensure the tank sits level using a carpenter’s level, even slight tilting affects valve function and creates uneven pressure on tank walls.
Connect the inlet pipe from your filtration system to the tank’s top opening, using flexible PVC couplings that accommodate minor settling. Seal all connections with marine-grade silicone to prevent leaks. Install the overflow outlet at 95% capacity height, directing excess water through four-inch PVC pipe to a drainage area at least 20 feet from buildings.
Cover all openings with 1/8-inch stainless steel mesh screens secured with UV-resistant zip ties or hose clamps. This prevents mosquitoes, rodents, and debris from entering while allowing proper venting. Check that your tank’s inlet includes a calming plate or diffuser to prevent sediment disturbance when water enters.
Step 5: Install the Distribution and Pump System
With your tank filled and protected, the next step is getting water where you need it, whether that’s your garden beds, toilet tanks, or household taps.
Start by installing the outlet valve at the tank’s base. Position it at least six inches above ground level to maintain gravity pressure and prevent sediment from entering your distribution lines. Use a ball valve for easy shutoff during maintenance, and wrap threads with plumber’s tape before tightening connections.
For most irrigation applications, gravity flow provides sufficient pressure if your tank sits elevated. Calculate roughly 0.43 psi per foot of elevation, a tank raised eight feet delivers about 3.5 psi, adequate for drip systems and soaker hoses.
When you need higher pressure for sprinklers, washing machines, or multi-story distribution, install a submersible or external pump rated for your flow requirements. Size the pump based on peak demand: typical household fixtures need 40-60 psi and 6-12 gallons per minute. Connect the pump downstream of your outlet valve, then run distribution pipes to your endpoints.
For potable applications, integrate a purification system between storage and household use. Position filters and UV sterilizers after the pump to ensure consistent pressure through treatment stages. Install a separate distribution line for non-potable irrigation to maximize efficiency and reduce purification costs.
Add a pressure gauge and check valve to prevent backflow into your tank, protecting water quality and system integrity.
Step 6: Add Water Level Monitoring and Overflow Protection
Install a visual float gauge on the tank’s exterior or mount a digital sensor inside to track water levels in real time. Float gauges offer a simple, no-power solution that displays current capacity at a glance, while electronic sensors can trigger alerts when the tank nears full. Position the overflow pipe at least 15 feet from your home’s foundation, directing excess water toward drainage areas or rain gardens to prevent erosion and structural damage. Secure mesh screens over the overflow outlet to block insects and debris. Add a backflow preventer valve where your distribution line connects to household plumbing, ensuring harvested water never contaminates municipal supply lines. Test the overflow during your first heavy rain to confirm proper drainage.
Testing Your System and Ensuring Proper Function
Once you’ve completed all the rainwater system steps thorough testing ensures your investment functions reliably and safely. Start by running water through the entire system while inspecting every connection point for leaks. Check gutters, downspouts, diverters, tank inlets, and all pipe joints, tightening fittings as needed. Fill your storage tank partially and monitor for 24 hours to catch any slow leaks or structural issues before the system is fully operational.
Next, verify flow rates match your design specifications. Turn on taps or irrigation connections and observe whether water pressure meets expectations. If you’ve installed a pump, confirm it cycles on and off correctly at the set pressure thresholds. Weak flow often indicates clogged filters or undersized pipes, while excessive pressure may require a regulator to prevent damage to fixtures.
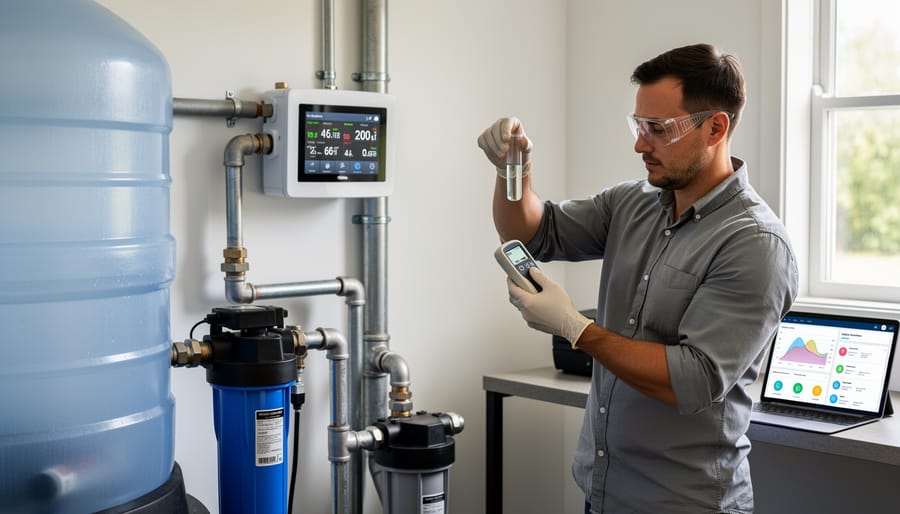
Water quality testing is critical, especially if you plan to use harvested water for anything beyond irrigation. Collect a sample from your tank outlet and test for pH, turbidity, and bacterial contamination. Basic test kits are available at hardware stores, though laboratory analysis provides more comprehensive results. This baseline helps you track changes over time and determines whether your water needs more than filtering to be truly safe.
For potable applications, integrate advanced purification at this stage. Technologies like ozone treatment eliminate pathogens without adding chemicals, ensuring harvested rainwater meets drinking water standards. Schedule this testing after your first significant rainfall to establish realistic performance benchmarks.
Monitor the system through at least one complete rain event, checking that first-flush diverters activate properly, filters catch debris as designed, and overflow outlets function without flooding. Keep a log of observations during this initial period to identify patterns and establish your maintenance schedule based on actual conditions rather than estimates.
Maintenance Schedule and Long-Term Care
A well-maintained rainwater harvesting system delivers reliable performance for decades. Establish a simple maintenance routine from day one, and you’ll prevent most problems before they start while keeping water quality consistently high.
Monthly Tasks
Check gutters and downspouts for visible debris accumulation, especially after storms. Clean first-flush diverters, these collect the dirtiest water and need frequent attention. Inspect all visible connections for leaks or loose fittings. If you have a pump, listen for unusual noises that might signal bearing wear or debris interference.
Routine Maintenance Schedule
- Monthly: Clear debris from gutters, clean first-flush diverters, check for leaks and unusual pump sounds
- Quarterly: Scrub pre-filtration screens, inspect tank overflow outlets, test water clarity with a visual check
- Twice yearly (spring and fall): Remove accumulated sediment from tank bottom, clean or replace sediment filters, trim overhanging branches near catchment areas
- Annually: Conduct full system inspection including all seals and gaskets, test water quality if used for potable applications, service pump according to manufacturer specs, verify backflow prevention devices function correctly
Seasonal changes demand extra attention. Before heavy rain seasons, ensure all filters are clean and gutters clear to maximize capture. In dry periods, check tank integrity more frequently since water levels drop and sediment concentrates. Winter preparation varies by climate, in freezing zones, drain exposed pipes and insulate vulnerable components.
Keep a maintenance log noting tasks completed and any issues observed. This simple record helps you spot patterns, like filters clogging faster during pollen season, and proves invaluable when troubleshooting problems. Most maintenance takes just 15-30 minutes per session, a small investment that protects your system and ensures the clean, reliable water supply you built it to provide.
Common Questions About Rainwater Harvesting System Components
How much roof area do I need for an effective rainwater harvesting system?
A typical residential system can collect around 600 gallons of water per 1,000 square feet of roof area from one inch of rainfall. Most homes have sufficient roof space, with even a modest 1,000-square-foot catchment area providing substantial water for irrigation and non-potable uses in moderate rainfall regions.
Is harvested rainwater safe to drink?
Rainwater collected from a clean catchment surface is generally safe for non-potable uses like irrigation and toilet flushing. For drinking water applications, you’ll need to integrate a proper purification system that includes filtration, UV sterilization, or reverse osmosis to remove contaminants, pathogens, and any pollutants picked up from the roof surface.
What does a complete rainwater harvesting system cost?
Basic systems for garden irrigation start around $1,000 to $3,000 for DIY installation, while comprehensive systems with larger storage tanks and distribution infrastructure range from $5,000 to $15,000 or more. Commercial applications requiring extensive storage and purification equipment can exceed $50,000, but most residential setups fall in the $3,000 to $8,000 range.
Do I need a permit to install a rainwater harvesting system?
Requirements vary significantly by location. Some areas actively encourage rainwater harvesting with rebates and streamlined permitting, while others have restrictions or require permits for plumbing connections. Check with your local building department and water authority before starting installation to ensure compliance with codes and regulations.
How much time does system maintenance require?
Routine maintenance takes about two to four hours per season. You’ll spend most of this time cleaning gutters and filters, inspecting the tank for debris, and checking pump operation. Annual deep cleaning and component inspections add another few hours but prevent costly repairs and ensure consistent water quality.
Beyond these common concerns, many people wonder about integrating rainwater systems with existing household plumbing. The good news is that most systems can tie into standard irrigation setups without major modifications. For indoor use, you’ll need backflow prevention devices and separate plumbing lines to keep harvested water isolated from municipal supply until it’s been properly treated.
Winter operation depends on your climate. In freezing regions, you’ll need to drain pipes and pumps before temperatures drop, or install heating elements and insulation to prevent ice damage. Tanks can remain full through winter since the large water volume resists freezing, but exposed pipes and valves are vulnerable.
Return on investment typically ranges from five to fifteen years for residential systems, faster in areas with high water costs or frequent drought restrictions. Commercial applications often see quicker payback through reduced utility bills and eligibility for green building certifications. The environmental returns are immediate, with every gallon harvested reducing strain on municipal systems and lowering your carbon footprint.
Building your own rainwater harvesting system represents a meaningful step toward sustainable living and water independence. By capturing and utilizing rain that falls naturally on your property, you reduce strain on municipal water supplies, lower your utility bills, and create a reliable backup source during droughts or water restrictions.
The environmental benefits extend beyond conservation. Every gallon of rainwater you harvest reduces energy-intensive water treatment and distribution demands. You minimize stormwater runoff that can overwhelm drainage systems and carry pollutants into local waterways. For irrigation purposes, rainwater’s natural softness and lack of chlorine actually benefit plants better than treated tap water.
The components you’ve learned to assemble work together as an integrated system that pays dividends for years. Your initial investment in quality tanks, filters, and proper installation creates a resilient infrastructure that adapts to your changing needs. When you pair these components with advanced purification technology, you unlock the full potential of harvested rainwater as a safe drinking source, not just for landscape use.
The economic case strengthens over time. Reduced water bills, lower energy costs for heating less water, and increased property value combine with the security of having water access independent of utility infrastructure. You’re no longer entirely dependent on systems beyond your control.
Take action now with the knowledge you’ve gained. Your rainwater harvesting system contributes to a more sustainable future while delivering practical benefits today.