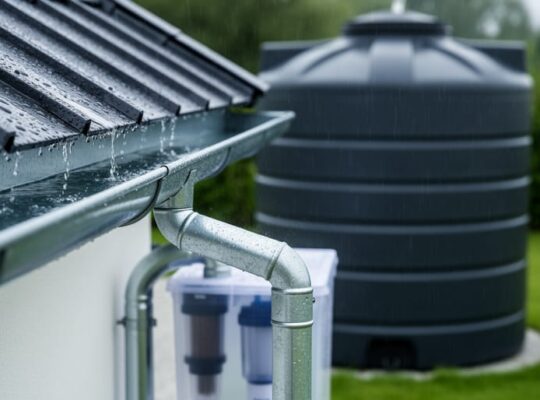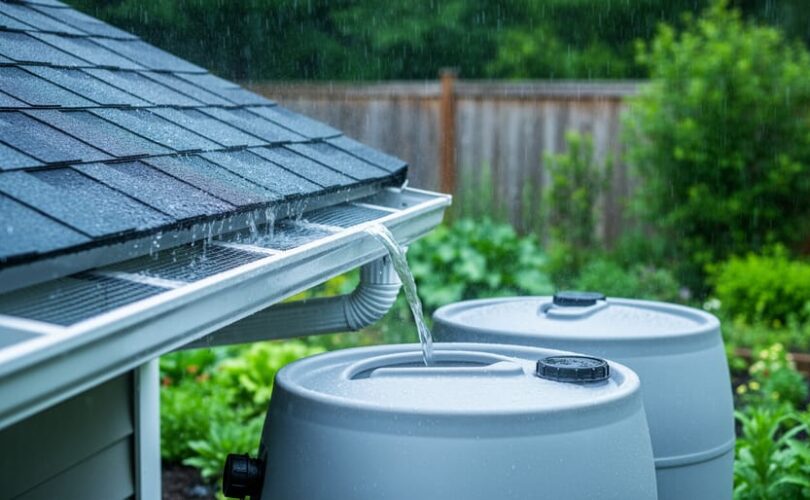
Building a rainwater harvesting system at home takes one weekend, costs between $150 and $800 depending on scale, and can capture thousands of gallons annually to irrigate gardens, flush toilets, and reduce municipal water dependence. The basic approach involves redirecting roof runoff into food-grade storage barrels through screened gutters, a straightforward process that requires no specialized plumbing skills but delivers measurable savings and environmental impact for years.
Rainwater harvesting transforms a wasted resource into a practical water source. The average roof sheds roughly 600 gallons for every inch of rainfall per 1,000 square feet of surface area. In many climates, that translates to 10,000 to 30,000 gallons annually running off into storm drains, carrying your water bill with it. Capturing even a fraction of that runoff cuts outdoor water use, buffers drought restrictions, and reduces stormwater pollution in local watersheds.
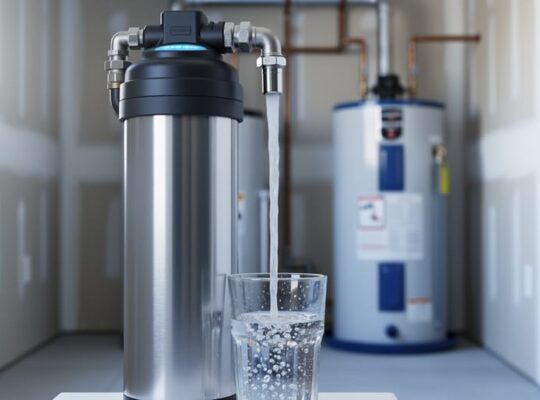
The science behind rainwater collection is elegantly simple. Gravity does the work: rain falls on an impermeable surface, flows through conveyance channels, passes through a debris filter, and settles in a sealed container. The result is soft water free of chlorine, fluoride, and dissolved minerals, ideal for plants and many household tasks. While collected rainwater requires proper treatment through methods like whole house filtration before it’s safe for drinking or cooking, non-potable applications need only basic screening and occasional maintenance.
This guide walks through every component and connection, from calculating your roof’s catchment area to winterizing your barrels and verifying water quality for intended use.
Why Build Your Own Rainwater Harvesting System
Building your own rainwater harvesting system puts you in control of a valuable resource while making a tangible difference for the planet. Every gallon you collect reduces demand on overtaxed municipal water supplies and stressed aquifers, which is especially critical in regions facing increased drought frequency. You’re not just saving water, you’re actively participating in watershed protection by capturing runoff that might otherwise contribute to erosion and storm drain pollution.
The financial benefits compound over time. Outdoor water use typically accounts for 30-50% of total household consumption during growing seasons, and harvested rainwater handles irrigation, car washing, and outdoor cleaning without touching your meter. Depending on your roof size and local rainfall patterns, a single 55-gallon barrel can capture 600+ gallons per inch of rain, translating to noticeable reductions in utility bills within the first year.
Beyond dollars and gallons, you gain resilience. When drought restrictions limit outdoor watering or summer demand drives up rates, your stored rainwater keeps gardens thriving and lawns healthy. This independence becomes invaluable during water emergencies or service interruptions.
The sustainability angle extends further when paired with comprehensive water management. While harvested rainwater excels for irrigation and outdoor tasks, combining it with advanced purification technology creates a complete approach to water stewardship. You conserve precious drinking water for its intended purpose while meeting other household needs through smart collection. This layered strategy maximizes both environmental impact and resource efficiency, turning your home into a model of responsible water use that adapts to climate challenges rather than surrendering to them.
Understanding the Basic Components of a Rainwater Harvesting System
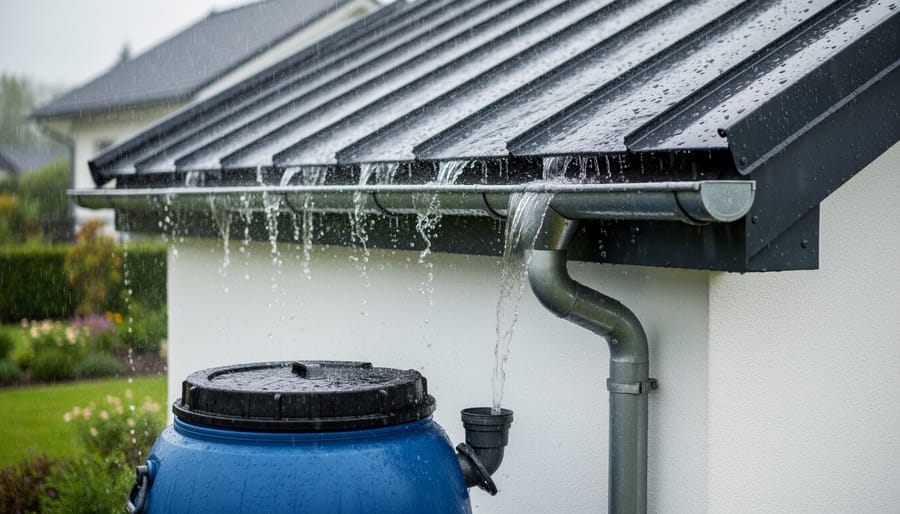
Every rainwater harvesting system works by capturing, filtering, and storing rainwater through a series of interconnected components. Understanding how each part functions helps you design a system that collects clean water efficiently while preventing contamination and structural issues.
The Catchment Area (Your Roof)
Your roof serves as the collection surface, and its material directly affects water quality. Metal, tile, and asphalt shingle roofs all work well, with metal roofs generally producing the cleanest runoff. The catchment area’s size determines your collection capacity: a 1,000-square-foot roof can harvest roughly 600 gallons from one inch of rainfall. Avoid roofs treated with toxic coatings or those near heavy pollution sources.
Gutters and Downspouts
These channels direct roof runoff toward your storage system. Clean, properly sloped gutters (one-quarter inch drop per 10 feet) prevent standing water where debris accumulates and mosquitoes breed. Downspouts concentrate the flow into manageable streams that connect to your storage tank. Seamless aluminum gutters resist corrosion better than sectional vinyl systems.
Core System Components
The remaining elements work together to ensure you collect quality water safely:
- First-flush diverter: Automatically diverts the first gallons of each rain event, which carry most roof contaminants, away from your tank.
- Storage tank: Holds collected rainwater in food-grade containers ranging from 55-gallon barrels to 10,000-gallon cisterns.
- Overflow mechanism: Safely redirects excess water away from your foundation when the tank reaches capacity.
- Inlet screening: Fine mesh filters that block leaves, insects, and debris at multiple points before water enters storage.
- Distribution system: Spigots, hoses, or pumps that deliver stored water to gardens, lawns, or outdoor cleaning tasks.
Each component addresses a specific challenge in rainwater collection. The first-flush diverter tackles the “roof washing” effect where initial rainfall picks up bird droppings, dust, and organic matter. Screens provide multiple filtration barriers, since even small gaps invite mosquitoes to lay eggs in standing water. The overflow valve prevents structural damage and flooding while managing storm events that exceed your storage capacity.
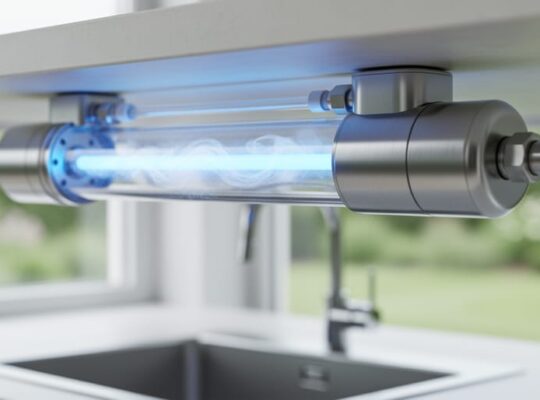
Optional upgrades like sediment filters, UV sterilizers, and pressurized pumps expand functionality, but the basic components above form a complete, functional system for non-potable outdoor uses.
Tools and Materials You’ll Need
Gathering the right tools and materials before you start prevents frustrating mid-project hardware store runs and ensures a smooth installation. Most items are available at home improvement centers, and a basic barrel system costs between $150 and $400 depending on your storage capacity and component quality.
Essential Tools
You’ll need a power drill with standard bits, a hacksaw or reciprocating saw for cutting downspouts and PVC pipe, an adjustable wrench or socket set, measuring tape, carpenter’s level, and a marker or pencil. A ladder tall enough to safely reach your gutters is critical. Add a hole saw attachment (typically 2-inch diameter) for drilling tank inlet holes, and keep safety glasses and work gloves handy.
Core Materials
Your storage tank forms the system’s heart. Food-grade polyethylene rain barrels (50-80 gallons) work well for starter systems, while larger properties benefit from 200-500 gallon cisterns. Look for UV-resistant, opaque containers to prevent algae growth. Budget $80-300 depending on capacity.
A downspout diverter kit ($25-50) automatically channels water into your tank and redirects overflow back to the original drainage path. You’ll need 10-15 feet of 3-inch PVC pipe and associated elbows and couplers for connections, plus PVC primer and cement for permanent joints.
Purchase fine stainless steel or brass mesh screening (at least 1/8-inch openings) to cover all openings, a brass hose bibb or spigot for water access, a 3/4-inch overflow valve or bulkhead fitting, and waterproof silicone sealant rated for outdoor use. If you’re elevating your barrel, grab four concrete blocks or construct a pressure-treated lumber platform.
First-flush diverters range from simple DIY vertical pipe designs to commercial units ($30-60) with automatic reset mechanisms after each storm.
Safety Precautions and Planning Considerations
Before you climb that ladder or drill into your first barrel, take time to plan and prepare. A DIY rainwater harvesting system is straightforward, but overlooking safety and regulatory details can turn an empowering project into a costly mistake.
Start with ladder safety. Working on gutters and downspouts means spending time on a ladder, often while handling tools and materials. Use a stable extension ladder on level ground, maintain three points of contact, and never overreach. If your roof is steep or high, consider hiring a professional for gutter work. It’s also smart to have a helper nearby to stabilize the ladder and hand up tools.
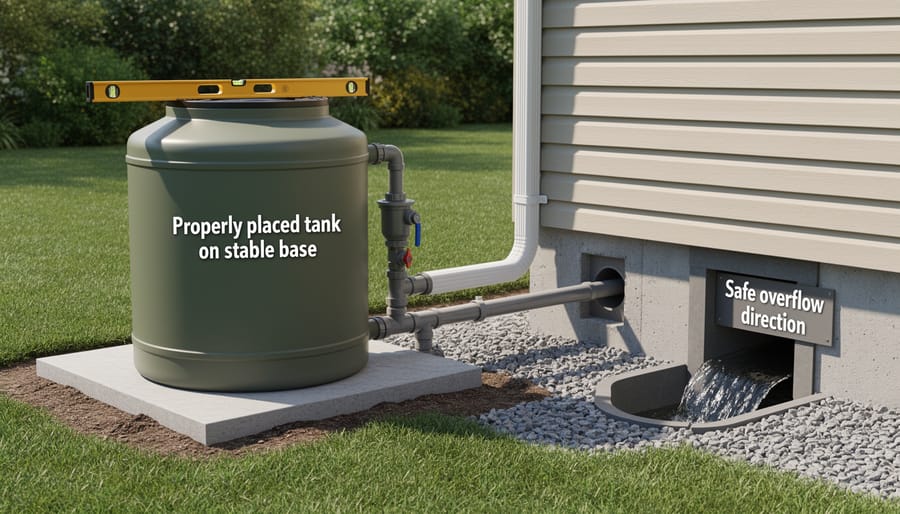
Tank placement demands careful thought. A full 55-gallon rain barrel weighs over 450 pounds, and larger cisterns can exceed several tons. Place your storage tank on a solid, level surface that can handle the load, concrete blocks, a reinforced platform, or a compacted gravel base work well. Position it close to the downspout to minimize piping, but far enough from your foundation that overflow won’t seep toward your basement or crawl space. Avoid placing heavy tanks on wooden decks unless you’ve verified the structure can support the weight.
Mosquito control is non-negotiable. Standing water breeds mosquitoes within days, turning your sustainability project into a public health nuisance. Use fine mesh screens on all openings, ensure your tank lid seals tightly, and inspect regularly for gaps. Consider adding a few drops of vegetable oil to the water surface or introducing mosquito dunks containing Bacillus thuringiensis if you spot larvae.
Child and pet safety matter too. Secure barrel lids with latches or straps to prevent accidental drowning, especially if you have young children or curious pets. An open barrel poses a real hazard.
Understand that harvested rainwater is for non-potable uses only, irrigation, car washing, toilet flushing. Roofs collect bird droppings, dust, chemicals from shingles, and airborne pollutants. Safe drinking water requires more than filtering; it demands certified purification systems designed to remove biological and chemical contaminants to EPA standards.
Finally, manage overflow properly. Direct your overflow pipe at least six feet from your foundation to a rain garden, permeable area, or storm drain. Uncontrolled overflow can erode soil, flood basements, or damage landscaping. Plan drainage paths before your first rain event, not after you discover a puddle against your house.
Step-by-Step Installation Process
Step 1: Choose and Prepare Your Collection Site
Start by walking your property during a rainstorm to identify which downspouts receive the most consistent flow, typically corners where larger roof sections converge. Choose a location with easy access for maintenance but away from high-traffic areas where a 50-gallon barrel might obstruct pathways.
Check your roof material: asphalt shingles and metal roofs work well, while treated wood or roofs with chemical coatings may leach contaminants. Avoid collecting from roofs near overhanging trees that drop excessive debris.
Prepare a stable, level base using concrete pavers or cinder blocks stacked at least 12 inches high. This elevation provides gravity-fed water pressure at your spigot. Use a carpenter’s level across multiple points to ensure the platform won’t tip when the tank fills to 400+ pounds. A rainwater harvesting calculator helps determine if your selected roof area and tank size match your water needs.
Step 2: Set Up Your Storage Tank
Place your storage tank on the prepared base, checking that it sits level in all directions with a spirit level. Even a slight tilt can stress seams over time and affect water distribution. Aim for 12-18 inches of elevation to create adequate water pressure for garden hoses, each foot of height generates roughly 0.43 psi. If your base is too low, add concrete blocks or a sturdy platform, ensuring the foundation can support the full weight (a 55-gallon barrel weighs over 450 pounds when full).
Locate the tank’s overflow port, typically pre-threaded near the rim. Thread in a brass or PVC overflow valve, applying plumber’s tape to the threads for a watertight seal. Position the valve outlet away from your home’s foundation, angling it toward your planned drainage path. Tighten by hand, then add a quarter-turn with a wrench, overtightening can crack plastic tanks.
Step 3: Install the First-Flush Diverter
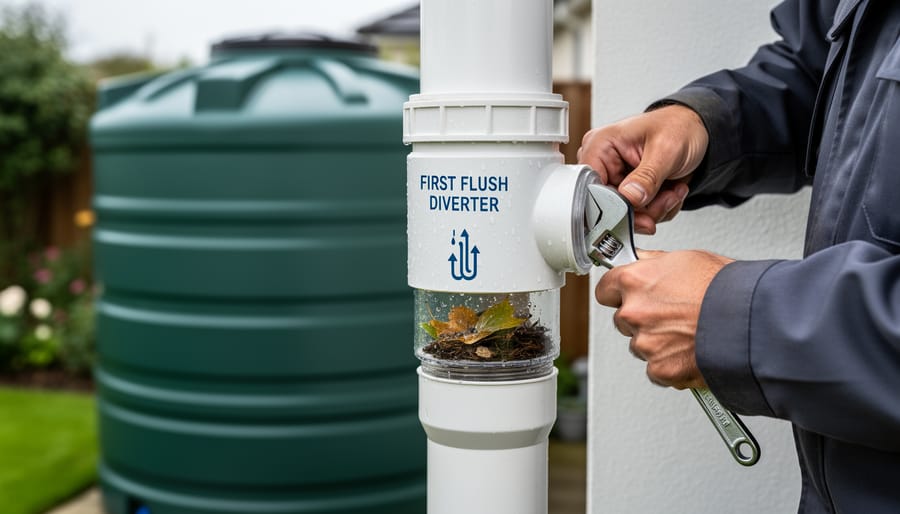
Cut your downspout approximately 12-18 inches above where it will meet your tank inlet. Install the first-flush diverter vertically at this junction point, following the manufacturer’s instructions for your specific model. Most diverters use a simple chamber design: the initial dirty water flows into a vertical pipe with a ball float, filling this chamber first before cleaner water flows to your tank.
Secure all connections with appropriate PVC cement or rubber gaskets to ensure watertight seals. Add a drain valve at the bottom of the diverter chamber so you can empty it between rain events. A good rule of thumb is to divert the first 10 gallons per 1,000 square feet of roof area. This critical component protects your stored water from bird droppings, dust, pollen, and roof contaminants that accumulate between storms, keeping your collection cleaner and reducing maintenance downstream.
Step 4: Connect the Downspout to Your Tank
With your first-flush diverter in place, you’re ready to complete the critical connection between downspout and storage tank. Measure and mark where the downspout needs to meet your tank inlet, typically 4-6 inches above the tank opening to allow gravity flow and accommodate screening. Use a hacksaw to cut the downspout cleanly at this mark, removing any burrs with sandpaper.
Install a flexible downspout elbow or PVC adapter to bridge the gap between the cut downspout and tank inlet. Wrap the joints with waterproof silicone sealant before connecting, this prevents leaks during heavy rain events when water volume peaks. Secure the connection with hose clamps or metal straps rated for outdoor use.
Before finalizing, place fine mesh screening (1/16-inch or smaller) over the tank inlet opening, securing it with a removable ring or clips. This catches leaves, twigs, and debris that slip past your gutter guards and first-flush system. Test the seal by running water through with a hose, watch for drips at joints and verify smooth flow into the tank without overflow at the connection point.
Step 5: Add Filtration and Screening
Fine mesh screening is your system’s defense against contamination. Install a stainless steel or durable plastic screen with openings no larger than 1mm across the tank inlet where your downspout connects. This blocks leaves, roof grit, and prevents mosquitoes from laying eggs inside your storage tank.
Secure the screen firmly with stainless steel screws or zip ties so it won’t shift during heavy rain. If you’re using a barrel with a removable lid, add a second layer of screening underneath the lid as backup protection. Check and clean these screens monthly, debris buildup restricts water flow and reduces collection efficiency during storms. A quick rinse with your garden hose removes accumulated sediment and maintains optimal filtration performance for your irrigation water.
Step 6: Install the Distribution System
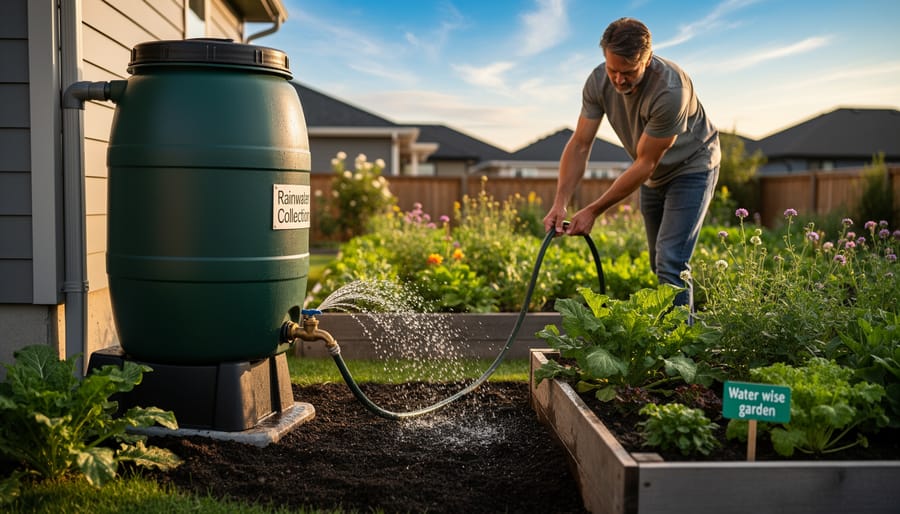
Attach a hose bibb or spigot 2-4 inches from the tank bottom using a bulkhead fitting and rubber gasket. Position it high enough to place a watering can underneath, but low enough to access most of your stored water. Hand-tighten the fitting from inside the tank, then secure it with a wrench from outside, checking for leaks once water is present.
For automated garden watering, connect a soaker hose or drip irrigation line directly to the spigot. Gravity provides sufficient pressure for ground-level watering if your tank sits at least 2-3 feet above your garden beds. Run the hose along plant rows, securing it with landscape staples. A simple timer valve between spigot and hose automates watering schedules without electricity, maximizing water efficiency while you’re away.
Step 7: Set Up Overflow and Drainage
Your overflow system protects both your harvesting setup and your home’s foundation. Without proper drainage, excess water pools around the tank and seeps toward your house, risking basement flooding and soil erosion.
Attach flexible downspout extension or PVC pipe to your overflow outlet, angling it at least six feet away from the foundation. Direct the discharge toward a rain garden, gravel drainage bed, or existing storm drain. Secure the pipe with stakes or straps so heavy flow won’t dislodge it.
Test the overflow during installation by filling the tank with a hose until water exits. Verify it flows away from structures and doesn’t create standing pools. Adjust the grade if needed, even a slight slope prevents backflow and erosion at the discharge point.
Testing Your System and Verifying Performance
After your first significant rainfall, conduct a thorough system check to ensure everything functions as designed. Start by inspecting all connection points while water flows through the system, looking for drips, seepage, or pooling around fittings. Pay special attention to the downspout-to-tank connection and any joints you sealed during installation. If you spot leaks, drain that section, clean and dry the surfaces completely, then reapply plumber’s sealant or tighten fittings as needed.
Verify your first-flush diverter is capturing and diverting the initial runoff by checking that its chamber fills first before water reaches your main tank. The diverter should collect debris-laden water from the roof’s initial wash, protecting your stored supply from contaminants. Once it fills to capacity, subsequent cleaner water should flow into your storage tank. If water bypasses the diverter entirely, check for blockages or improper installation angle.
Test overflow capacity by filling your tank with a garden hose to simulate heavy rainfall. The overflow pipe should activate smoothly when the tank reaches maximum capacity, directing excess water away from your foundation without backflow or spillage around the tank lid. Mark your tank’s water level before a rain event, then measure again afterward to calculate collection efficiency and verify your catchment area is performing as expected.
- All connection points are dry with no visible leaks or moisture
- First-flush diverter fills completely before water enters main tank
- Overflow activates at proper level and drains away from foundation
- Screens remain intact with no gaps allowing debris entry
- Hose bibb or spigot operates smoothly without leaking
- Tank remains level and stable on its base without shifting
For slow fill rates, inspect your screens and diverter for clogs from leaves or sediment. Clean these components and verify your downspout provides adequate flow. If overflow capacity seems inadequate during heavy storms, consider upgrading to a larger diameter overflow pipe or adding a secondary overflow valve. Document your system’s performance over several rain events to establish baseline collection rates and identify patterns that might require adjustments.
Maintenance and Seasonal Care
A properly designed rainwater system requires minimal upkeep, just a few simple tasks throughout the year keep it running efficiently.
Quarterly cleaning tops the list. Every three months, clear debris from gutters and check your inlet screens for leaves, pollen, and sediment. This 15-minute task prevents clogs and maintains collection efficiency. While you’re at it, inspect the first-flush diverter to ensure it’s redirecting initial runoff properly.
Algae prevention matters in warm months. Once a month during spring and summer, peer into your tank. If you spot green growth on walls or detect musty odors, it’s time for a cleaning. Opaque tanks and tight-fitting lids prevent most algae issues by blocking sunlight and organic matter.
Mosquito monitoring protects public health. Check weekly for larvae, they look like tiny wriggling threads near the water surface. Proper screening at all openings should prevent entry, but inspect seals and mesh regularly. Any gaps need immediate attention.
Annual deep cleaning involves draining the tank completely, scrubbing interior surfaces with a stiff brush, and rinsing thoroughly. Schedule this during your dry season. It’s similar to maintaining any water system, though harvested rainwater requires different treatment than the clean water for every tap inside your home.
Winterization is critical in freezing climates. Before temperatures drop below 32°F, drain the tank completely, disconnect hoses, and insulate exposed pipes. Some homeowners remove and store barrels indoors until spring.
Scaling Up and Next Steps
Once your basic barrel system is running smoothly, you’ll likely want to increase capacity and functionality. Expansion can be as simple or sophisticated as your needs and budget allow.
The easiest upgrade is connecting multiple barrels in series using overflow connections. This multiplication of storage requires minimal additional plumbing and maintains the gravity-fed simplicity of your original design. For more substantial expansion, consider replacing barrels with a dedicated cistern (300-5,000 gallons). These larger tanks collect water from multiple downspouts simultaneously and offer better cost-per-gallon efficiency. Use a size your tank calculator to match storage capacity to your roof area and typical rainfall patterns.
Adding a pump transforms your system from gravity-fed to pressurized, enabling drip irrigation across larger gardens, second-story use, or automatic distribution. Submersible pumps inside the tank or external centrifugal pumps both work well, with the choice depending on your layout and pressure requirements.
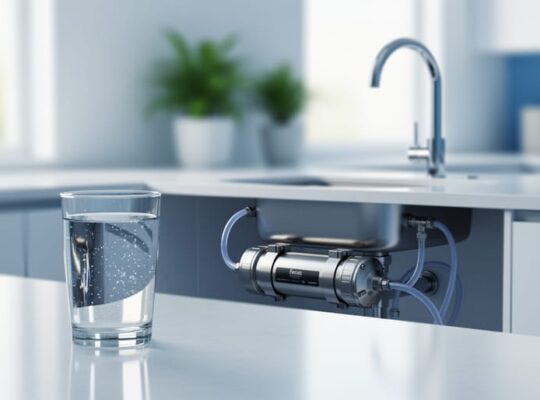
As you scale, enhanced filtration becomes worthwhile. Pre-tank sand filters or cartridge systems remove finer sediment and improve water clarity for outdoor uses. However, rainwater remains suitable only for non-potable applications unless you incorporate certified purification technology. For drinking water, advanced systems like Living Water’s multi-stage purification are essential to remove pathogens, chemical contaminants, and dissolved solids that simple filtration can’t address.
The ultimate sustainable water strategy pairs rainwater harvesting for landscape irrigation with whole-home purification for drinking and cooking. This integrated approach maximizes municipal water conservation while ensuring your family has access to clean, safe water for every purpose.
Frequently Asked Questions
Homeowners considering DIY rainwater harvesting often have similar questions about legality, capacity, and practical operation. Here are answers to the most common concerns.
Is rainwater harvesting legal in my area?
Most states allow residential rainwater collection, but a few impose restrictions or require permits. Check with your local municipality and homeowners association before starting your project, as regulations vary widely by region.
How much water can I realistically collect?
A rough estimate is 0.6 gallons per square foot of roof area per inch of rainfall. A typical 1,000-square-foot roof can collect about 600 gallons from a one-inch rain event, though actual collection depends on your system’s efficiency and local rainfall patterns.
Can I drink harvested rainwater?
Not without proper purification. Rainwater collected from roofs contains contaminants from shingles, bird droppings, and atmospheric pollutants, making it unsafe for drinking or cooking without advanced filtration and treatment systems specifically designed for potable water.
What size tank do I need?
Start by calculating your irrigation needs and typical rainfall frequency. A 50-gallon barrel works for small gardens, while larger landscapes may require 200-500 gallons or more to bridge dry periods between rain events.
How do I prevent my system from freezing in winter?
Drain your system completely before the first freeze, disconnect hoses and downspout connections, and store barrels upside down or indoors. For year-round systems in cold climates, insulate tanks and pipes or install them below the frost line.
What’s the return on investment timeline?
Most DIY systems pay for themselves in 2-5 years through reduced water bills, depending on your local water rates, system cost, and usage patterns. The environmental benefits and increased property resilience add value beyond direct financial returns.
Beyond these basics, consider your specific climate and water needs when designing your system. If you live in an area with seasonal droughts, size your storage to capture spring rains for summer use. Properties with large irrigated areas benefit from multiple collection points feeding a central cistern.
The legal landscape continues to evolve as water conservation becomes more critical. Some municipalities now offer rebates or tax incentives for rainwater harvesting installations, effectively shortening your payback period. Research what programs exist in your area before purchasing materials.
Remember that while harvested rainwater excels for outdoor irrigation, toilet flushing, and washing, it requires significantly different treatment than a basic DIY system provides to become safe drinking water. Pair your collection efforts with appropriate purification technology if you’re pursuing comprehensive water independence.
Building your own rainwater harvesting system represents more than a weekend DIY project. It’s a tangible step toward water independence and environmental responsibility that delivers measurable results from the first rainfall.
Every gallon you collect reduces strain on municipal water supplies and aquifers, particularly during drought conditions when these resources face the greatest pressure. Your system helps recharge local groundwater, prevents stormwater runoff pollution, and cuts your utility bills. These benefits compound over time as you refine and expand your setup.
Starting with a single barrel teaches you the fundamentals without overwhelming investment. As you gain confidence watching your system perform through different weather patterns, scaling up becomes straightforward. Add another barrel, upgrade to a larger cistern, or connect multiple downspouts. Each expansion multiplies your water security and environmental impact.
Remember that rainwater harvesting excels for outdoor irrigation, vehicle washing, and similar non-potable applications. For drinking water needs, advanced purification technology remains essential to remove contaminants and ensure safety. The most sustainable homes integrate both approaches: harvesting rainwater to conserve municipal supplies while relying on proven filtration systems for consumption.
Your DIY rainwater harvesting system demonstrates that individual action creates real change. You’re not waiting for policy shifts or infrastructure upgrades. You’re taking direct control of your water footprint, one rain event at a time. That’s the kind of practical environmentalism that builds momentum toward genuine sustainability.