A rainwater harvesting calculator lets you determine exactly how much water your roof can collect each year and what size storage tank you need based on your local rainfall, roof area, and household demand. These free online tools turn basic measurements into actionable system designs, typically requiring just 10-15 minutes to generate results that show whether rainwater harvesting makes sense for your property and how quickly your investment will pay off.
The calculation itself is straightforward: multiply your roof’s catchment area by your region’s annual rainfall and a collection efficiency factor (usually 75-90% to account for losses from evaporation, overflow, and first-flush diversion). A 2,000-square-foot roof in an area receiving 40 inches of annual rainfall can theoretically capture over 49,000 gallons per year. But the real power of a calculator comes from matching that supply against your actual water needs, identifying seasonal gaps, and right-sizing storage to avoid both shortage and unnecessary expense.
Understanding these numbers transforms rainwater harvesting from an appealing concept into a concrete plan. You’ll know if a 500-gallon tank covers your garden irrigation or if you need 5,000 gallons to support household use during dry months. The calculator also reveals whether your climate and roof size can realistically support your water independence goals or if you’ll need supplemental sources.
Once you’ve collected the water, proper treatment ensures it’s safe for any use you have in mind. Pairing smart system sizing with effective purification creates a complete, sustainable water solution that reduces utility costs and environmental impact year after year.
What You’ll Need to Use a Rainwater Harvesting Calculator

Before you open a rainwater harvesting calculator, gather the right information. Plugging in guesswork wastes time and produces unreliable results, accurate inputs are the foundation of a properly sized system.
Start with your roof measurements. You need the total square footage of your catchment surface, which typically means your roof. Walk around your home or building with a tape measure, or pull up your property blueprints if available. Measure length and width for each roof section, including attached garages or sheds if you plan to connect them to your collection system. A laser distance measurer speeds this up and improves accuracy on larger structures.
Next, locate reliable rainfall data for your specific area. National weather service records, local agricultural extension offices, and regional water authority websites publish average monthly precipitation figures. Don’t rely on national averages, rainfall varies dramatically even within the same county. Look for data spanning at least ten years to account for wet and dry cycles. Many calculators accept monthly rainfall inputs, which reveal seasonal patterns critical for storage planning.
You’ll also need a realistic estimate of your water consumption. Review a few months of water bills to establish your baseline usage, typically measured in gallons or liters per day. If rainwater will serve only specific purposes, irrigation, toilet flushing, laundry, calculate those uses separately rather than total household demand. Be honest about your needs; overestimating leads to oversized, expensive tanks, while underestimating leaves you short during dry spells.
To use most calculators effectively, compile these essentials:
- Roof dimensions: length, width, and total square footage of catchment area
- Local rainfall data: monthly averages for your zip code or municipality
- Water usage figures: daily or monthly consumption in gallons or liters
- Measuring tools: tape measure, laser distance measurer, or architectural plans
- Calculator access: online tool, spreadsheet, or mobile app designed for rainwater harvesting
Some calculators ask for your roof pitch angle and material type, since steeper roofs and smoother surfaces like metal collect more water than flat, porous shingles. If you know these details, have them ready. Storage capacity preferences matter too, decide whether you want enough reserve for two weeks, a month, or an entire dry season before you start calculating. That target shapes the system the calculator recommends.
Important Considerations Before You Calculate
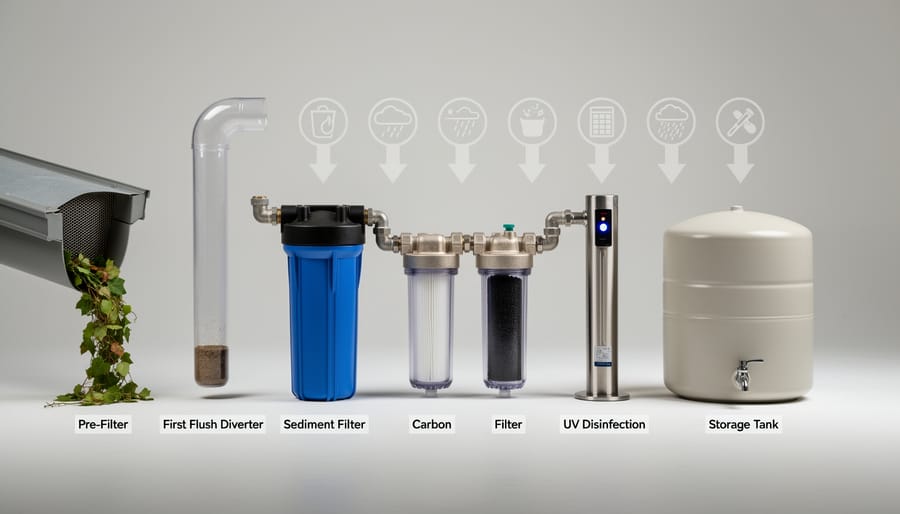
Before plugging numbers into a calculator, understand the practical and legal realities that shape your rainwater harvesting system. Skipping these considerations now can mean expensive redesigns or safety risks later.
Start with your roof material. Asphalt shingles and metal roofs work well for non-potable uses like irrigation, but they shed chemicals and particulates that require filtration for any indoor application. Wood shake, treated timber, and asbestos roofs introduce toxins that make the water unsuitable even with basic filtering. Clay tile and slate are ideal, they’re inert and long-lasting, but their weight demands structural assessment before you install large storage tanks nearby.
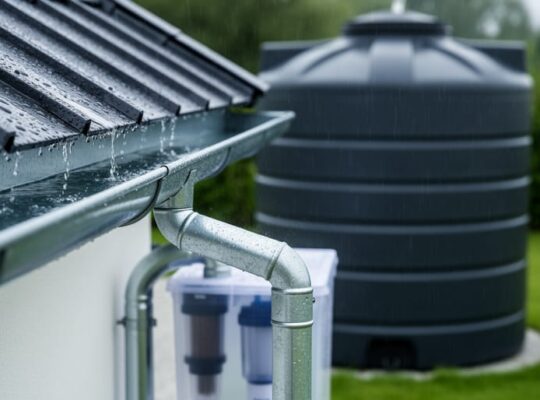
Water quality depends on what your roof collects. Bird droppings, leaves, pollen, and airborne pollutants contaminate runoff, especially during the first flush after dry periods. A first-flush diverter discards this initial flow, but you’ll still need treatment for potable use. If you plan to drink harvested water, systems that provide more than filtration including UV sterilization and multi-stage purification, become essential, not optional.
Regulations vary widely. Some regions encourage rainwater harvesting with tax credits, while others restrict it or require licensed plumbers for installation. Check county and municipal codes for permit requirements, tank placement rules, and backflow prevention mandates. States like Oregon have detailed Oregon rainwater regulations specifying approved uses and system standards. Ignoring this step risks fines and forced system removal.
Maintenance is ongoing. Gutters need cleaning, tanks require annual inspection, and filters demand regular replacement. If you’re integrating whole-house filtration factor in servicing schedules and component costs. Neglected systems become breeding grounds for algae and mosquitoes, turning a sustainability solution into a health hazard.
Step-by-Step: Calculating Your Rainwater Harvesting Potential
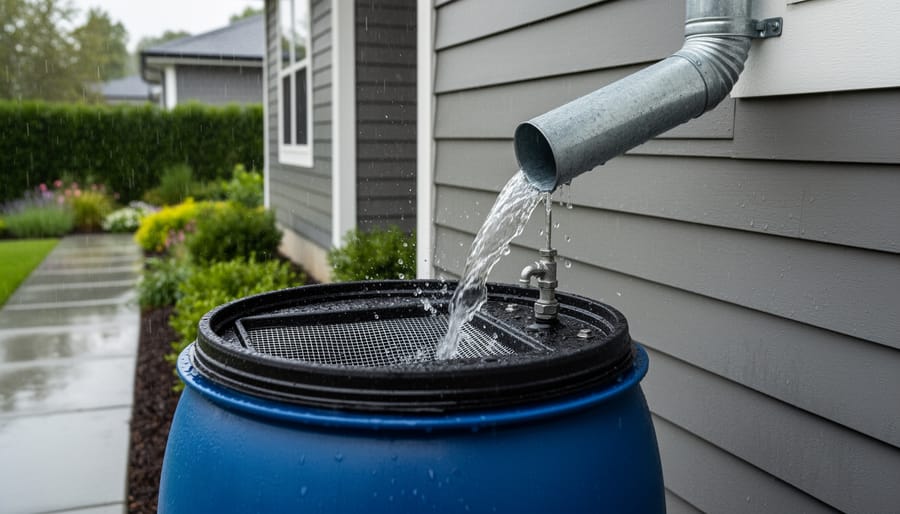
Measuring Your Collection Surface Area
Accurate measurement of your collection surface begins with your roof’s horizontal footprint, not the sloped surface itself. Stand back and measure the building’s length and width at ground level, or use property records for these dimensions. Multiply length by width to get your base catchment area in square feet or meters.
Most calculators require the horizontal projection because rainfall is measured vertically. A 1,000-square-foot footprint collects the same volume whether the roof is flat or steeply pitched, the rain falls straight down, and the calculator accounts for this.
Next, identify sections you cannot or should not collect from. Exclude any roof areas with treated wood shingles, asbestos, lead flashing, or surfaces regularly exposed to bird droppings or industrial pollutants. These contamination sources make water unsafe even after basic filtration. Also subtract zones where gutters cannot practically be installed or where runoff would be difficult to direct toward your storage tanks.
For complex roofs with multiple levels, dormers, or wings, break the structure into rectangles and measure each section separately. Add the usable portions together for your total catchment area.
If your roof has significant overhangs or your calculator asks for them, measure the horizontal distance from the building wall to the drip edge. Overhangs count toward collection since they catch additional rainfall. Round measurements to the nearest foot, calculator accuracy rarely requires inch-level precision for residential systems.
Determining Local Rainfall and Water Demand
Start by gathering accurate rainfall data for your specific location rather than relying on regional averages. The NOAA climate normals tool provides 30-year precipitation averages by zip code, giving you a reliable baseline for calculating collection potential. Look for monthly breakdowns rather than just annual totals, since seasonal variation dramatically affects how much water you’ll harvest throughout the year. Your city or county water authority may also publish local rainfall records that reflect microclimates in your area.
For water demand estimation, track your current usage through utility bills over several months to establish a realistic baseline. Residential users typically consume 80-100 gallons per person daily for all purposes, but your rainwater system might only supplement specific uses like irrigation, toilet flushing, or laundry. List which applications you plan to supply with harvested water and estimate their individual demand. Outdoor irrigation often represents the largest seasonal need, ranging from 20 gallons per week for small gardens to 200+ gallons for larger landscapes during dry months.
Commercial operations should calculate demand by function rather than total facility usage. A restaurant replacing potable water for dishwashing needs different figures than a landscaping business watering client properties. Break down monthly usage patterns to identify peak demand periods when your storage capacity must carry you through dry spells between rainfall events.
Entering Data and Interpreting Results
Once you’ve gathered your measurements and rainfall data, entering them into a rainwater harvesting calculator follows a straightforward sequence. Start with your collection surface area in square feet or square meters, depending on the calculator’s preferred units. Most tools will ask for total roof area first, then let you specify the roof material.
The runoff coefficient is where many users hesitate. This decimal value between 0.5 and 0.95 represents what percentage of rainfall actually reaches your collection system after accounting for absorption, evaporation, and splash-off. Metal roofs typically score 0.90 to 0.95, asphalt shingles around 0.85, and clay tiles closer to 0.75. If your calculator doesn’t suggest values, choose conservatively, using 0.80 for an asphalt roof rather than 0.85 gives you a more realistic estimate.
Next, input your average monthly or annual rainfall totals. Some calculators accept yearly averages and distribute them automatically, while others require month-by-month data for seasonal analysis. Enter your daily water consumption figure, which should reflect actual household usage rather than wishful thinking.
The calculator will generate several key numbers. Collection potential shows total annual gallons your roof can harvest based on rainfall and surface area. Storage capacity recommendation suggests tank size needed to bridge dry periods while meeting your usage goals. Many calculators also display a water security percentage, the portion of annual demand your system can realistically supply.
Pay attention to monthly breakdowns if provided. A system might collect 80% of your annual needs but still run short during summer months. That seasonal gap matters more than the annual average when planning actual water independence.
Optimizing Your System Design
After the calculator generates your recommended tank size, the real design work begins, tailoring that number to your specific situation. A calculator might suggest a 5,000-gallon tank, but if your property can only accommodate 3,000 gallons or your budget caps at half that capacity, you’ll need to adjust.
Start by comparing your seasonal water demand against rainfall patterns. If your area receives consistent rain year-round, a smaller tank may suffice since you’ll refill frequently. In regions with distinct dry seasons, oversizing storage by 20-30% provides a crucial buffer when collection drops to zero for months.
Budget constraints often force compromise. Rather than abandoning the project, consider phased installation, starting with a smaller tank and expanding capacity later as funds allow. Multiple smaller tanks can offer more placement flexibility than one large unit.
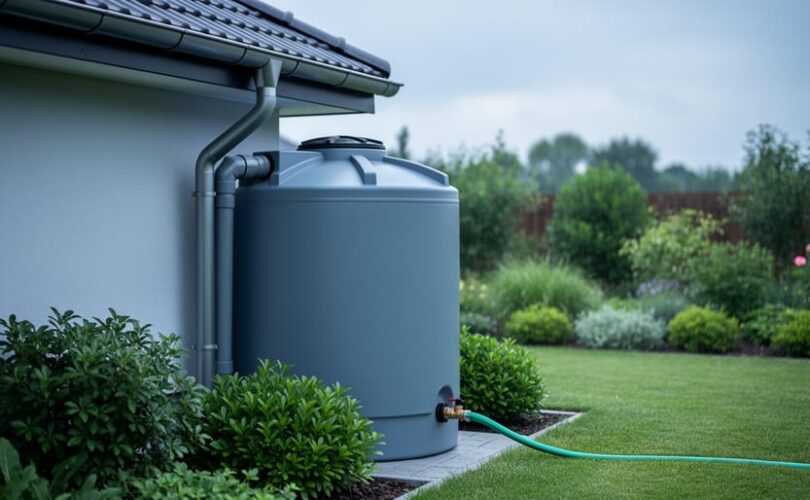
Space limitations sometimes demand creative solutions. Slimline tanks fit narrow side yards, while underground cisterns preserve above-ground space. Calculate your actual footprint requirements before finalizing tank selection.
The sweet spot balances three factors: enough capacity to bridge dry periods, realistic budget parameters, and available space. Don’t chase perfect self-sufficiency if it means overspending on capacity you’ll rarely use.
Verifying Your Results and Planning Next Steps
Your calculator’s numbers are only as reliable as the validation process you apply to them. Start by cross-checking your results with a manual calculation: multiply your catchment area in square feet by annual rainfall in inches, then by 0.623 to convert to gallons. If this rough estimate differs significantly from your calculator output, recheck your inputs, particularly roof measurements and runoff coefficient. Download rainfall data from NOAA or your local weather service rather than relying on calculator defaults, since microclimates can vary substantially even within the same zip code.
Compare your projected collection volume against real installations in your area. Local rainwater harvesting associations, permaculture groups, or sustainable building forums often share system performance data. If your 1,500-gallon system calculation seems capable of meeting 80% of your annual water needs while similar-sized systems nearby only achieve 50%, you’ve likely overestimated either collection efficiency or underestimated actual usage. These reality checks prevent costly oversizing or, worse, undersizing that leaves you dependent on municipal backup far more than anticipated.
Test your system design against seasonal demand patterns. Chart monthly rainfall alongside your household usage to identify gaps where stored water won’t suffice. If your calculator shows adequate annual capacity but summer dry spells last three months while your tank only holds six weeks of water, you’ll face shortages. Build in a safety margin, most experienced harvesters aim for 20-30% more storage than calculations suggest, accounting for filter maintenance downtime, unexpected dry periods, and gradual efficiency losses as systems age.
Moving from calculations to actual system design means selecting components that match your verified needs. Tank material and size should reflect your space constraints and budget, but don’t compromise on overflow management, undersized overflow pipes create dangerous roof loads during storms. Your calculator told you how much water you can collect; now determine how you’ll use it. Garden irrigation requires only basic filtration, but if you want clean water for every tap in your home, you need multi-stage purification that removes pathogens, sediment, and chemical contaminants.
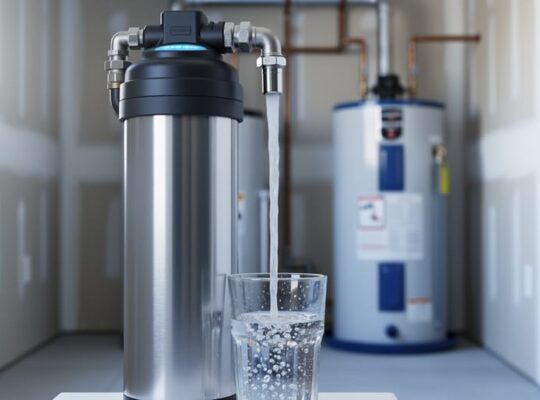
Integration with water purification technology transforms harvested rainwater from a sustainability gesture into genuine water independence. Advanced filtration and UV treatment systems ensure harvested water meets drinking water standards, creating a complete solution from collection through consumption. This is where proper planning during the calculation phase pays off, undersized tanks mean purification systems work harder during low-collection periods, while oversized systems without adequate turnover can develop water quality issues. Your calculator provided the foundation; verification and thoughtful component selection build a system that delivers safe, clean water year-round.
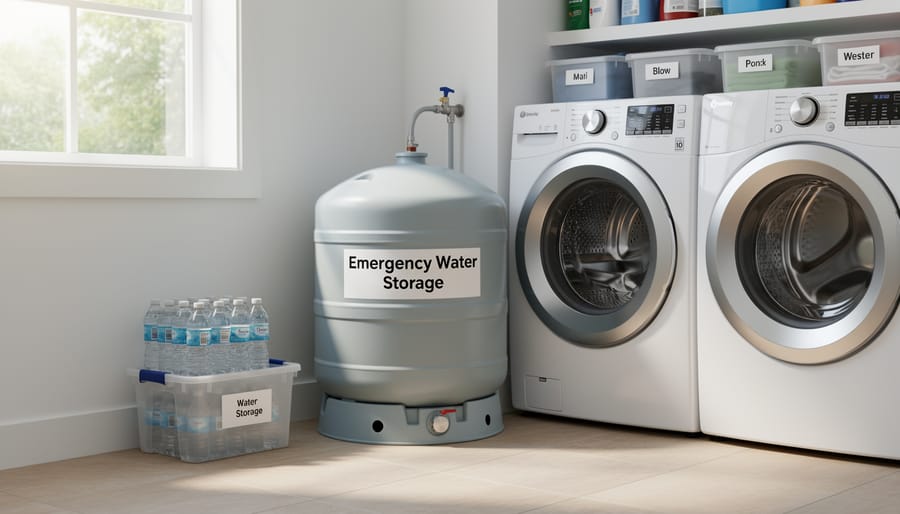
Understanding Your Calculator Results
Your calculator results reveal four critical metrics that guide your system design. Understanding what each number means helps you make practical decisions rather than getting overwhelmed by data.
Collection Volume shows the total rainwater you can realistically harvest over a year. This figure accounts for your roof’s actual catchment area multiplied by your region’s rainfall and adjusted by a runoff coefficient (typically 0.8 for pitched metal roofs, lower for other materials). If your calculator estimates 45,000 gallons annually and your household uses 60,000 gallons, you’re achieving 75% water independence through rainwater alone.
Storage Recommendations suggest tank capacity based on your longest dry period and daily demand. The calculator balances two risks: undersizing means you’ll run dry during droughts, while excessive storage wastes money on water you’ll never use. Most systems recommend 2-4 weeks of storage capacity. For a household using 200 gallons daily, that translates to a 2,800-5,600 gallon tank.
Overflow Predictions indicate how often your system will reach full capacity. Frequent overflow (more than 30% of rainfall events) suggests you’re undersizing for your rainfall pattern and losing harvestable water. Minimal overflow might mean you’re overbuilt for your climate.
Water Security Metrics estimate how many days per year you’ll need backup water sources. A well-designed system targeting 80% independence might show 70 supplemental-water days annually, clustered in summer dry spells. If you’re pursuing potable use, these numbers help plan for treatment beyond filtering to ensure consistent water quality year-round.
Common Questions About Rainwater Harvesting Calculators
Rainwater harvesting calculators provide estimates based on the data you enter, but real-world conditions introduce variables that no calculator can perfectly predict. Accuracy depends heavily on the quality of your inputs, precise roof measurements and local rainfall data yield more reliable results than rough estimates. Most calculators assume ideal conditions with properly maintained gutters and clean collection surfaces, so expect actual collection to be 5-15% lower due to losses from evaporation, splash-out, and first-flush diversion systems.
Should I design my system around average rainfall or worst-case drought years?
Design for average rainfall with adequate storage buffer. Planning for worst-case scenarios typically results in oversized, expensive systems that sit mostly empty, while average-year planning with 2-3 months of storage provides practical resilience without excessive cost.
How accurate are rainwater harvesting calculators?
Calculators provide estimates within 10-20% accuracy when given quality inputs. They cannot account for every variable like unusually positioned trees, roof deterioration, or maintenance lapses, so treat results as planning guidelines rather than guarantees.
What is the smallest system worth installing?
A 500-1,000 liter system can meaningfully offset garden irrigation and toilet flushing for an average household. Anything smaller often costs more to install and maintain than the water savings justify, unless you are testing feasibility before expanding.
Do I need purification if the calculator says my water is just for irrigation?
Not for non-potable outdoor use, but if you ever plan to use harvested water indoors or for drinking, a proper purification system becomes essential for safety and regulatory compliance.
Seasonal variations matter more than many calculators initially reveal. Your system might collect abundant water during spring months but face significant shortfalls in summer when demand peaks for irrigation. Recalculate annually if your water usage patterns change, adding family members, installing a garden, or pursuing sustainable water independence for drinking water all shift your requirements substantially. Integration with municipal supply works best as a backup rather than primary source, allowing your rainwater system to handle typical needs while grid water covers peak demand or extended dry spells. The cost-benefit calculation extends beyond simple water bill savings to include property value increases, environmental impact, and resilience during supply disruptions or restrictions.
A rainwater harvesting calculator transforms what might seem like an overwhelming project into a manageable, data-driven decision. You’ve learned how to measure your collection potential, understand your water needs, and design a system that fits your property and budget. These tools remove the guesswork and give you confidence that your investment will deliver real results.
Beyond the practical benefits of reduced water bills and drought resilience, rainwater harvesting represents a meaningful step toward environmental stewardship. Every gallon you collect is one less gallon drawn from stressed aquifers and rivers. When combined with proper filtration and advanced purification technology, harvested rainwater becomes a safe, sustainable source that can meet all your household needs, from irrigation to drinking water.
The calculator is your starting point, not your finish line. Use those results to research systems, consult with installers, and explore purification options that match your water quality goals. Water independence isn’t built overnight, but it begins with understanding what’s possible on your property. You now have the knowledge to take that first step with clarity and purpose. The science supports it, the technology exists, and the environmental impact makes it worthwhile.